It’s show season and that often becomes a time when people begin cleaning their tack. They want it to be nice and clean before they step into the show ring. The beginning of summer is also a great time to check your tack over for safety before you clean it. As we all start riding more, it’s important to be sure your tack will perform when you need it to.
I have spent many a morning at shows putting bridles back together after a student took it apart to clean. Therefore; you might want to begin by taking a picture of your bridle while it is still put together. That way you will have something to compare it to when you start putting all the clean pieces back together.
Next gather all the materials you will need.
- A bucket large enough to hold your bit, filled with hot water.
- Another bucket filled with warm water. You will use this water to clean the leather.
- Your favorite leather cleaner.
- Your favorite leather conditioner.
- Several small sponges.
- Several clean towels. Small ones work well.
- Optional- Silver cleaner or polish
- Optional-Toothpaste (for bits)
- Optional- Gentle, hand or dish soap (for silver)
- Optional- A small screwdriver for chicago screws
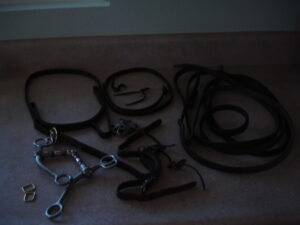 Now, take the bridle apart. Remove every screw and all the metal pieces that comes off. Place all the metal pieces in the hot water to soak. If you have a curb chain without leather straps, you can put it in as well. If it has leather straps and chain, clean by hand.
Continue taking the bridle apart by opening every buckle and pulling all the pieces apart. Lay them out where you can easily get to them. Dip a small sponge in the warm water and squeeze out the excess. Now add a small amount of cleaner to the sponge. Work up a lather and begin rubbing one piece of the bridle at a time. Rub until all the dirt is off the leather and into the lather. Be sure to check the stitching as lots of dirt and sweat build up there. This can cause the stitching to rot prematurely. You may need to rinse out your sponge and repeat the process if the leather is really dirty. Use a damp towel to remove the lather and thus the dirt. Set the clean pieces aside so you don’t get them mixed up with the dirty ones. Repeat with the next piece until all pieces are clean. Allow them to air dry or use a towel.
Now start over with your first piece. Using another clean, dry sponge, apply conditioner to the piece. Rub it in well. Repeat until the leather is no longer absorbing the conditioner. Several light applications works better than one heavy one. Use a dry towel to remove the excess and buff lightly to make it shine. Set that piece aside and repeat until the entire bridle is conditioned.
After all the leather is clean and conditioned it’s time to focus on the metal pieces.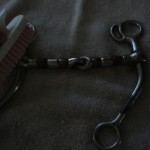 You should have a bit, perhaps some chicago screws or conway buckles and either conchos or small metal rectangles. You may also have trigger snaps if you use them on the reins. Start with the bit by using a stiff brush, scrub all the goo off. You can add some toothpaste if it is particularly stubborn. Be very careful about using abrasive materials on your bit. It could cause scratches that damage the bit or will injure your horse’s mouth. Rinse well and dry the bit with a clean towel. Check the bit carefully for deep scratches that may harm your horse. This is especially important with copper parts as this soft metal is easily chewed out of shape. Repeat with the other metal pieces. If you have silver pieces, use silver cleaner on them only if they are tarnished. Silver cleaners will remove the protective coating the manufactures put on it, so make sure that is already off before you clean it. If the silver is dirty but not tarnished, just use soap and water. Dry all the metal pieces and set aside.
Now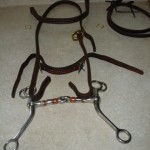 it’s time to re-assemble the bridle. Using your picture if necessary, lay all the pieces down in the order they need to be put back together. Look at it carefully to be sure all the pieces are in the right place, order and right side up. Attach the browband to the crown piece first. If there are metal keepers or conchos between the browband and the throatlatch, slide them on next.
 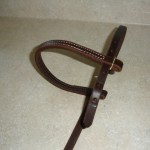 Then put the throat latch through the browband being sure to get the buckle on the correct side. Next, attach the cheek pieces to the crown piece. Now attach your shiny, clean bit making sure it is right side up. The curb strap /chain is next and finally the reins. If you are using chicago screws you can put a drop of clear nail polish or Loc-tite on the treads to keep them from coming loose.
Be sure to adjust the bridle when you put it back on your horse. It is very common to forget this step and then you may find you don’t have the control you are used to! As an easy reminder, you might want to put a piece of colorful yarn around the bridle. 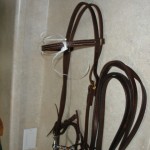 Or you could simply leave the reins un-attached. Once the bridle is properly adjusted, simply remove the yarn or re-attach the reins. For everyday care, keep a damp towel handy to wipe down the bridle before you put it away. This will keep the bridle cleaner, making your deep cleanings go much faster. Plus you will be adding years to your bridle and keep it safer to use. Have a great (and safe) ride!
If you have any tack-related safety tips, please share them here!
Cheryl Rohnke Kronsberg is a Certified Horsemanship Association Master Instructor and Clinic Instructor. She is also an AQHA Professional Horseman. Cheryl has been teaching riding and horsemanship for over 30 years. Currently she and her husband own and operate CRK Training Stable in Yorba Linda, CA. We welcome your comments and questions. Please feel free to share this article with your friends, but rights to publish this article are restricted. For more interesting articles from Cheryl go to www.crktrainingstable.com
